 |
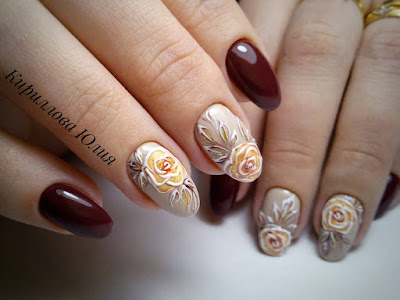
| Secrets of a perfect manicure | EASY Nail Art Designs for Beginners |
When we remove the old varnish. Wadded disc with nail polish remover should be pressed to the nail and hold for a few seconds, so that the varnish softens and dissolves first, and then erase it in 1-2 passes. If you start immediately rub hard old lacquer, we can damage the surface layer, and the nail will deteriorate, as its surface becomes porous and rough.
See our favorite nail art ideas:
 To shape the nail optimally with a fine-grained nail file. In order to make sure of this, rub it with your working surface along the wrist - you should not feel any chipping. Before filing too grown nails, you must first cut the nail scissors from the set, and only then shape the nail file.
A small digression. Metal nail file - for extended or false nails, and glass nail file is suitable for natural. The abrasiveness of nail files for natural nails is lower than that of nail files for artificial nails.
Preparing for a new varnish. Spread on the skin around the nail means for softening the cuticle and a few minutes (see how the skin) to hold your hands in the bath with warm water. Pre-dripping into the water a few drops of almond or lavender oil. This is both useful and pleasant, and effective.
Use the orange stick to push back the cuticle, it is strong enough and at the same time soft. There are also sticks made from juniper and sandalwood. If you do not have it, you can use a finger wrapped with a towel.
More about the cuticle. Apply a drop of any nourishing oil to the cuticle and rub it into the surface of the entire nail. We advise you to do this simple procedure every day, and the protected skin that surrounds the nail plate will reduce its rate of growth.
Excess oil can be removed with a cotton pad slightly moistened with the same nail polish remover. Having dried your nails, you can start applying the base under the varnish and then the varnish itself.
Advice from the masters of nail salons:
before applying the varnish, just roll it in your palms. This will help evenly mix the contents. But do not shake the bottle! You run the risk of applying a lacquer that does not contain air bubbles that can ruin any manicure. Metal balls inside the varnish will do their job.
 You applied a finishing coat of varnish on your nails. Then the next trick - drop your fingertips in very cold water - this will speed up the process of setting the varnish. In water, lacquer hardens even faster than just in the air.
Another retreat. New, fresh varnishes dry faster than old ones!
Give the nails the desired shape. The most resistant to the occurrence of chips and cracks is a square shape with rounded edges (the so-called quadroval).
If you apply 2-3 coats of lacquer, keep 2-3 minutes between applying the next layer. So you will achieve a stronger grip between the layers.
Peeling of the lacquer layer begins on the cuticle side, on the border between the nail plate and the skin, so when applying lacquer, retreat a little from the cuticle, thereby slowing down the destruction of the varnish.
At the end of the procedure. Apply a layer of transparent fixative - this will help you to keep the manicure ideally longer. It may be just a clear varnish or a special tool.
Here are some of the basic tricks to apply a perfect manicure.


 To shape the nail optimally with a fine-grained nail file. In order to make sure of this, rub it with your working surface along the wrist - you should not feel any chipping. Before filing too grown nails, you must first cut the nail scissors from the set, and only then shape the nail file.
A small digression. Metal nail file - for extended or false nails, and glass nail file is suitable for natural. The abrasiveness of nail files for natural nails is lower than that of nail files for artificial nails.
Preparing for a new varnish. Spread on the skin around the nail means for softening the cuticle and a few minutes (see how the skin) to hold your hands in the bath with warm water. Pre-dripping into the water a few drops of almond or lavender oil. This is both useful and pleasant, and effective.
Use the orange stick to push back the cuticle, it is strong enough and at the same time soft. There are also sticks made from juniper and sandalwood. If you do not have it, you can use a finger wrapped with a towel.
More about the cuticle. Apply a drop of any nourishing oil to the cuticle and rub it into the surface of the entire nail. We advise you to do this simple procedure every day, and the protected skin that surrounds the nail plate will reduce its rate of growth.
Excess oil can be removed with a cotton pad slightly moistened with the same nail polish remover. Having dried your nails, you can start applying the base under the varnish and then the varnish itself.
Advice from the masters of nail salons:
before applying the varnish, just roll it in your palms. This will help evenly mix the contents. But do not shake the bottle! You run the risk of applying a lacquer that does not contain air bubbles that can ruin any manicure. Metal balls inside the varnish will do their job.
Another retreat. New, fresh varnishes dry faster than old ones!
Give the nails the desired shape. The most resistant to the occurrence of chips and cracks is a square shape with rounded edges (the so-called quadroval).
If you apply 2-3 coats of lacquer, keep 2-3 minutes between applying the next layer. So you will achieve a stronger grip between the layers.
.
Peeling of the lacquer layer begins on the cuticle side, on the border between the nail plate and the skin, so when applying lacquer, retreat a little from the cuticle, thereby slowing down the destruction of the varnish.
At the end of the procedure. Apply a layer of transparent fixative - this will help you to keep the manicure ideally longer. It may be just a clear varnish or a special tool.
Here are some of the basic tricks to apply a perfect manicure.


